
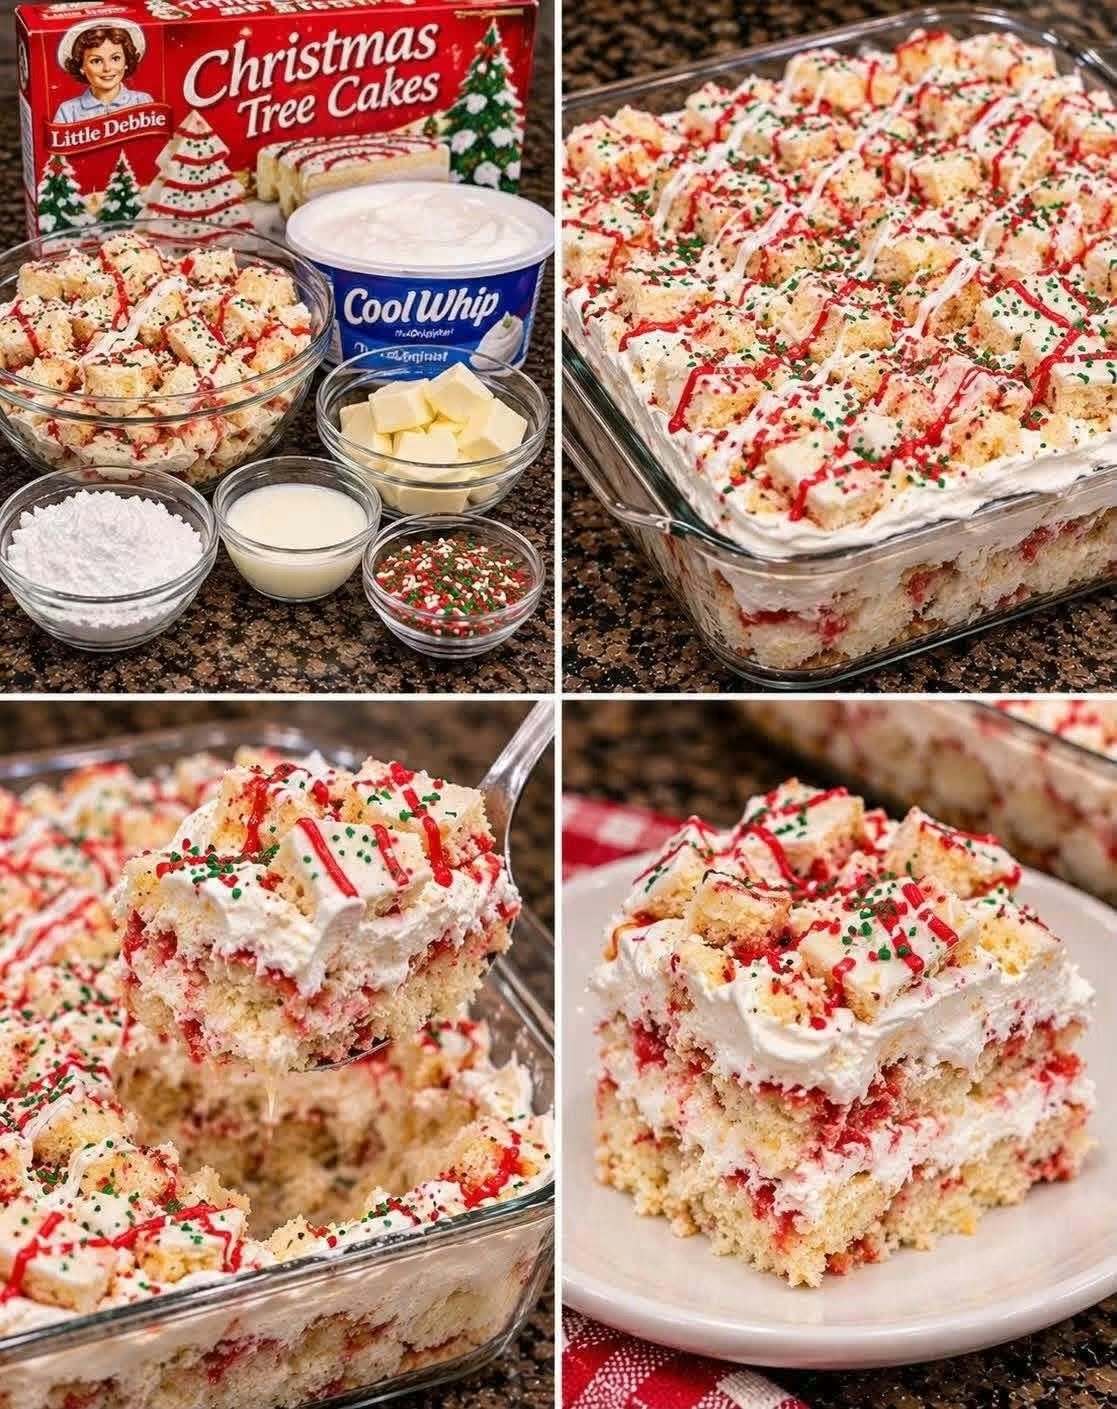
A festive, creamy and delicious Christmas dessert made with Little Debbie Christmas Tree Cakes, fluffy Cool Whip, sweet cream cheese frosting and colorful holiday sprinkles!
This easy layered dessert is perfect for Christmas parties, family gatherings and holiday potlucks. No complicated baking required!
Prep time: 20 minutes
Chilling time: 4 hours
Total time: 4 hours 20 minutes
Servings: 12–15
Recipe note: The image doesn’t show exact measurements, so this is a suggested complete recipe based on the ingredients pictured.
1. Ingredients
For the cake layers
- 10 Little Debbie Christmas Tree Cakes (about 10–12 oz)
- ½ cup whole milk
For the creamy filling
- 8 oz (225 g) cream cheese, softened
- ½ cup unsalted butter, softened
- 2 cups powdered sugar
- 1 tsp vanilla extract
- 2 tbsp milk
- 1 container (8 oz / 225 g) Cool Whip, thawed
For the topping
- 1½ cups Cool Whip
- ½ cup chopped Christmas Tree Cakes
- Red decorating icing
- Red, green and white Christmas sprinkles
2. Step-by-step instructions
Step 1 – Prepare the baking dish
Lightly grease a 9 × 13-inch glass baking dish or line it with parchment paper.
Step 2 – Prepare the Christmas cakes
Cut the Little Debbie Christmas Tree Cakes into small bite-sized cubes.
Reserve a handful of pieces for decorating the top.
Step 3 – Make the cream cheese filling
In a large mixing bowl, beat the softened cream cheese and butter until smooth and creamy.
Add powdered sugar, vanilla extract and milk.
Continue beating until the mixture is fluffy and well combined.
Step 4 – Fold in the whipped topping
Gently fold the thawed Cool Whip into the cream cheese mixture using a spatula.
Mix until light and fluffy.
Step 5 – Create the first cake layer
Arrange half of the Christmas Tree Cake pieces across the bottom of the baking dish.
Lightly drizzle with a little milk to keep the cake moist.
Step 6 – Add the creamy layer
Spread half of the cream cheese mixture evenly over the cake pieces.
Smooth the surface using a spatula.
Step 7 – Add the second cake layer
Arrange the remaining cake pieces over the creamy filling.
Gently press them into place.
Step 8 – Add the remaining filling
Spread the remaining cream cheese mixture over the second cake layer.
Make sure the entire surface is covered.
Step 9 – Decorate
Spread the remaining Cool Whip over the top.
Add the reserved Christmas cake pieces.
Drizzle red decorating icing over the dessert and finish with festive red, green and white sprinkles.
Step 10 – Refrigerate
Cover the dish with plastic wrap and refrigerate for at least 4 hours, preferably overnight.
This helps the layers set and makes slicing much easier.
Step 11 – Serve and enjoy!
Cut into squares and serve chilled.
Enjoy the delicious combination of soft cake, creamy filling and fluffy whipped topping!
3. Tips for the perfect Christmas dessert
- Make sure the cream cheese is completely softened before mixing.
- Thaw Cool Whip in the refrigerator before using.
- Avoid adding too much milk because the cakes are already moist.
- Use a spatula to create smooth, even layers.
- Add the sprinkles shortly before serving to keep their colors vibrant.
- Chill overnight for cleaner slices.
4. Delicious variations
- Chocolate version: Add chocolate pudding between the layers.
- Strawberry version: Add fresh chopped strawberries.
- Peppermint version: Add ¼ teaspoon peppermint extract to the filling.
- Extra festive: Use crushed candy canes as decoration.
- White chocolate version: Sprinkle white chocolate shavings over the top.
5. Storage instructions
- Refrigerator: Store covered for up to 3 days.
- Freezer: Freeze individual portions for up to 1 month for best quality; texture may change slightly after thawing.
- Serving: Keep refrigerated until ready to serve.
Easy no-bake Christmas dessert!
Soft Christmas cake, fluffy cheesecake filling, creamy whipped topping and festive sprinkles make this dessert a holiday favorite!